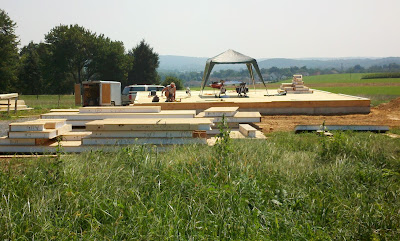
So on August 20th, we began. Safety first: cover any "holes" (like this hatchway to the crawl space).
Set up a shelter against the blazing sun.
And start by striking chalk lines to mark the wall edges, and designate those areas for door openings that would not have wall-sills ("no glue")
Checking to make sure everything was square (we'd had lots of rain, so swelling was a concern), and marking these access points, as well as marking off and drilling for electrical wiring access, took most of Saturday.
Note the 2x6" sill, which has been glued/screwed onto the deck. Note also the 1/2" ledge that the outer skin of OSB will rest on. The bottom of each panel is channeled to fit over the 2x6, and the base of each panel is glued and nailed to the 2x6 (both inner and out skins). Even though there is a 1" channel for electrical wiring drilled horizontally through each panel (to run outlet boxes), we thought it might be easier just to feed up from the crawl space. Note the holes drilled into the crawl space below deck ("duplex outlet" symbol drawn in lower right).
This is the first panel being raised. It was assembled from 4 pieces: 2 sides, a bottom, and laminated veneer lumber header to support the load over this 100" wide window.
And so it went until by the end of the day (3-ish, after all it was Saturday and the builders had worked all week), we had our first corner built. This is Bob, Robin, Eric & Terry--picture courtesy of Eva, Bob's wife, and erstwhile provider of snacks and iced teas!


